
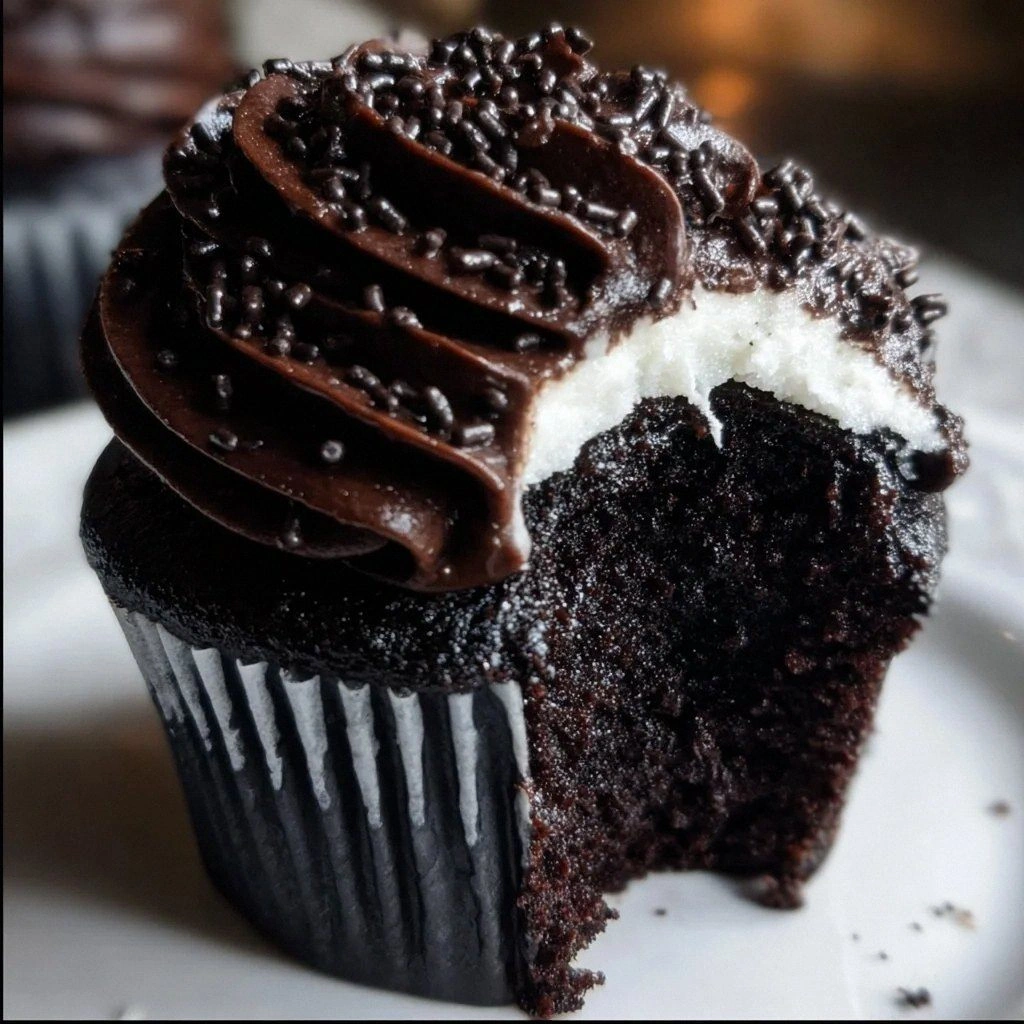
A molten chocolate masterpiece paired with velvety vanilla ice cream – pure indulgence in every bite.

I still remember the first time I tasted a molten chocolate cake – it was a rainy evening in Paris, the kind of night when the city’s lights flicker like fireflies and the air smells of fresh baguettes. A tiny patisserie on Rue Montorgueil served a single, steaming cake that oozed dark, glossy chocolate the moment I broke the crust. My heart raced, my senses ignited, and I knew I had to bring that moment home.
The chocolate lava cake, originally a French invention from the 1980s, has become a global symbol of comfort and decadence. Paired with a scoop of homemade vanilla ice cream, the contrast of hot and cold, rich and creamy, creates a symphony that feels both luxurious and familiar. This recipe respects the classic technique while adding a few modern twists that guarantee a flawless lava flow every time.
In this guide, I’ll walk you through every nuance – from selecting the perfect dark chocolate to mastering the timing that makes the center burst with molten bliss. You’ll learn how to balance flavors, how to achieve a perfectly risen outer crust, and how to serve it with a cloud of silky ice cream that never melts too quickly.
So, roll up your sleeves, preheat that oven, and let’s create a dessert that will become the centerpiece of your next gathering. Your guests will thank you, and you’ll feel the same joy I felt in that Parisian patisserie.
🌟 Why This Recipe Will Captivate You
Whether you’re a seasoned baker or a home cook looking for a show‑stopping dessert, this chocolate lava cake delivers on taste, texture, and visual drama.
- ✨ Perfectly Balanced Sweetness: The recipe uses a blend of 70% cacao dark chocolate and a touch of cane sugar, ensuring the lava is rich without being cloyingly sweet.
- ✨ Foolproof Technique: By chilling the batter and using ramekins with precise measurements, you get a crisp outer shell and a fluid interior every single time.
- ✨ Versatile Pairings: Serve it with classic vanilla ice cream, a dollop of salted caramel, or a sprinkle of fresh berries for endless customization.
- ✨ Minimal Equipment: All you need are ramekins, a whisk, and a standard oven – no sous‑vide or special molds required.
- ✨ Impressive Presentation: The glossy, molten center peeks through a cracked crust, making it Instagram‑ready without any extra effort.
- ✨ Time‑Efficient: With just 15 minutes of prep and 10 minutes of bake time, you can serve a restaurant‑quality dessert on a weeknight.
🥗 Ingredients
📝 Complete Ingredient List
For the Chocolate Lava Cake:
- 200 g dark chocolate (70% cacao), chopped
- 100 g unsalted butter, cubed
- 3 large eggs
- 70 g granulated sugar
- 30 g all‑purpose flour, sifted
- a pinch salt
For the Vanilla Ice Cream (optional, homemade):
- 250 ml whole milk
- 250 ml heavy cream
- 100 g granulated sugar
- 1 tsp vanilla extract
- 3 large egg yolks
For Garnish:
- a handful fresh raspberries
- 1 tbsp powdered sugar, for dusting
- 2 tbsp unsalted butter, melted (for ramekin greasing)

🔍 Focus on Key Ingredients
Dark Chocolate (70% cacao)
The chocolate is the heart of the lava. A high cocoa content provides depth, a slight bitterness that balances the sugar, and a glossy melt. Look for chocolate labeled “couverture” – it contains cocoa butter, which ensures a smooth, fluid center.
Unsalted Butter
Butter adds richness and helps create the delicate crust. Using unsalted butter gives you control over the final salt level, allowing the pinch of salt to shine through without overwhelming the chocolate.
Eggs
Eggs act as both leavening and emulsifiers. The yolks contribute to the custardy texture, while the whites help the cake rise just enough to form a crackable shell. Fresh, room‑temperature eggs give the batter a uniform consistency.
🔄 Quick Substitutions
| If you don’t have... | Use instead... |
|---|---|
| Dark chocolate (70% cacao) | Bittersweet chocolate (60–70% cacao) |
| Unsalted butter | Salted butter (reduce added salt) |
| All‑purpose flour | Gluten‑free flour blend (same volume) |
👨🍳 Step‑by‑Step Instructions
Follow these detailed steps to create a flawless lava cake. The key is timing and temperature – keep an eye on the clock, and you’ll be rewarded with a molten center that flows like silk.
📋 Phase 1: Preparation and Mise en Place
Gather, measure, and pre‑heat before you begin mixing.
Grease the Ramekins
Using a pastry brush, coat each of the four 6‑ounce ramekins with melted butter, then dust lightly with flour. Tap out any excess flour. This coating ensures the cakes release cleanly after baking and adds a subtle buttery flavor to the crust.
Pre‑heat the Oven
Set your oven to 220 °C (425 °F). A high temperature creates a rapid set on the outer edge while keeping the interior liquid. Place a rack in the middle of the oven for even heat distribution.
🔥 Phase 2: Mixing, Baking, and the Magic
Combine the ingredients with care, then bake to perfection.
Melt Chocolate and Butter
Place the chopped dark chocolate and cubed butter in a heat‑proof bowl over a pot of simmering water (bain‑marie). Stir constantly until smooth and fully combined. Remove from heat and let it cool for about 5 minutes – this prevents the eggs from scrambling later.
Whisk Eggs and Sugar
In a separate bowl, whisk the three large eggs with 70 g of granulated sugar until the mixture turns pale yellow and thickens (about 2‑3 minutes). This incorporates air, giving the final cake a light interior.
Combine Chocolate with Egg Mixture
Gently fold the cooled chocolate‑butter mixture into the egg‑sugar blend. Use a rubber spatula and a gentle motion to keep the batter airy. Once combined, sift the flour and a pinch of salt over the batter, folding just until no streaks remain.
✨ Phase 3: Finishing Touches and Plating
Bake, cool briefly, and serve with ice cream.
Portion the Batter
Divide the batter evenly among the prepared ramekins (about 1/4 cup each). Tap the ramekins gently on the counter to release any air bubbles.
Bake the Cakes
Place the ramekins on a baking sheet and bake for 10‑12 minutes. The edges should be firm while the center still jiggles when you gently shake the ramekin. Do not overbake, or the lava will solidify.
Prepare the Ice Cream (if homemade)
While the cakes bake, whisk together milk, cream, sugar, and vanilla. Heat gently until the sugar dissolves, then temper the mixture with the egg yolks. Cook over low heat, stirring constantly, until the custard coats the back of a spoon (about 80 °C). Chill, then churn in an ice‑cream maker according to the manufacturer’s instructions.
Unmold and Plate
Let the cakes rest for 1 minute, then run a thin knife around the edges. Invert each ramekin onto a warm dessert plate; the cake should release with a gentle tap. Place a generous scoop of vanilla ice cream beside each cake, dust with powdered sugar, and garnish with fresh raspberries.
Serve Immediately
Serve while the cakes are still warm. Encourage diners to cut through the crust with a spoon, allowing the molten chocolate to cascade over the ice cream.
💡 Expert Tips and Tricks
🛒 Choosing the Best Ingredients
Look for chocolate that lists cocoa butter as the first ingredient and has minimal additives. A good quality butter should be creamy and free of water. When buying eggs, choose free‑range or pasture‑raised for richer yolks, which contribute to a smoother texture.
🔪 Preparation Techniques
Always melt chocolate and butter together; melting them separately can cause the chocolate to seize. Sifting the flour prevents lumps and ensures an even distribution. Chill the batter for at least 15 minutes before baking – this helps the outer crust set quickly.
🌡️ Mastering the Cooking Process
The oven’s temperature is critical. A too‑low temperature results in a cake that cooks through without a molten center; too high, and the outer shell may burn. Use an oven thermometer for accuracy and set a timer for 10 minutes, checking the edge firmness before removing.
🍽️ Presentation and Service
Warm the plates in the oven for a minute before plating; this keeps the cake hot longer. A light dusting of powdered sugar adds elegance, while a few fresh berries provide acidity that cuts through the richness. For an extra touch, drizzle a thin stream of caramel or raspberry coulis.
🏆 Pro Secrets
Professional pastry chefs rely on precision, timing, and a few scientific tricks to achieve that perfect lava flow every time.
- 🎯 Temperature Shock: After baking, briefly place the ramekin on a pre‑heated skillet (medium‑high) for 10 seconds. This creates a sharper crust while preserving the molten interior.
- 🎯 Ratio Control: The chocolate‑to‑butter ratio of 2:1 (by weight) ensures a glossy, fluid center. Deviating from this balance can make the lava too thick or too runny.
- 🎯 Egg Incorporation: Whisk eggs with sugar until they reach a ribbon stage (the mixture falls back onto the whisk in a ribbon). This incorporates air and stabilizes the batter, preventing a gummy texture.
- 🎯 Use of a Water Bath: For ultra‑consistent results, bake the ramekins in a shallow pan of hot water (about 1‑2 cm deep). The steam helps regulate the internal temperature, producing a uniform lava flow.
- 🎯 Resting Time: Allow the cakes to rest for exactly 60 seconds after removal. This brief pause lets the interior settle just enough to stay molten but not spill over when unmolded.
- 🎯 Flavor Layering: Add a pinch of smoked sea salt to the chocolate mixture before baking. The subtle salinity elevates the chocolate’s depth and balances the sweetness of the ice cream.
“A great dessert is a balance of science and emotion – the lava cake epitomizes that dance.” — Dominique Ansel, Chef & Pastry Innovator
🔄 Variations and Adaptations
The basic framework of this lava cake invites endless creativity. Below are some popular twists that let you tailor the dessert to dietary preferences, seasonal flavors, or playful themes.
🥬 Vegetarian / Vegan Version
Replace butter with equal parts coconut oil, use a plant‑based dark chocolate (ensure it contains no dairy), and substitute eggs with a mixture of 1 tbsp flaxseed meal + 3 tbsp water per egg (let sit 5 minutes to thicken). The result is a slightly nuttier flavor while keeping the lava effect intact.
- Vegan dark chocolate (70% cacao) – provides the same richness.
- Coconut oil – solid at room temperature, mimicking butter’s texture.
- Flax “egg” – adds binding and moisture without animal products.
🌶️ Flavor Variations
Spice lovers can infuse the chocolate with a hint of heat or aromatic herbs. Below are three exciting directions:
Spicy Chili Version
Add ¼ tsp cayenne pepper or a finely chopped fresh chili to the melted chocolate. The subtle heat amplifies the chocolate’s complexity without overpowering the dessert.
Mediterranean Orange‑Rose Version
Stir in 1 tsp orange zest and ½ tsp rose water into the chocolate mixture. The citrus‑floral notes pair beautifully with the vanilla ice cream.
Asian Matcha‑Black Sesame Version
Blend 1 tsp matcha powder into the batter and sprinkle toasted black sesame seeds on top before baking. This adds an earthy, slightly bitter contrast that is both visual and flavorful.
⚠️ Dietary Adaptations
Gluten‑Free
Substitute the all‑purpose flour with a 1:1 gluten‑free flour blend. Ensure the blend contains xanthan gum for structure.
Lactose‑Free
Use dark chocolate that is dairy‑free, replace butter with a dairy‑free margarine, and make the ice cream with coconut milk or lactose‑free cream.
Low‑Calorie
Cut the butter by half and replace half of the chocolate with unsweetened cocoa powder mixed with a little extra butter to maintain texture. Serve with a light sorbet instead of ice cream.
👶 Family / Kids Version
For younger palates, reduce the cocoa percentage to 55% and add a spoonful of caramel sauce inside the batter before baking. Top with a drizzle of chocolate syrup and colorful sprinkles instead of raspberries.
📦 Storage and Reheating
🧊 Conservation
Refrigerator
- Duration: Up to 3 days
- Recommended container: Airtight glass or plastic container
- Tip: Store the cakes without ice cream; add the ice cream fresh when serving.
Freezer
- Duration: Up to 2 months
- Method: Wrap each cooled cake tightly in plastic wrap, then place in a freezer‑safe bag.
- Defrosting: Transfer to the refrigerator overnight, then bring to room temperature for 20 minutes before reheating.
💡 Note: Freezing may slightly alter the lava’s fluidity; a brief re‑bake restores the ideal texture.
♨️ Reheating
🔥 Oven (Recommended)
- Preheat to 180 °C (350 °F).
- Cover each cake loosely with aluminum foil to prevent over‑browning.
- Reheat for 8‑10 minutes, until the edges are warm and the center begins to jiggle.
- Remove foil and continue for 2 minutes if you prefer a crispier crust.
⚡ Microwave (Quick)
- Place cake on a microwave‑safe plate.
- Heat on medium power for 30‑45 seconds.
- Check the center; if still solid, add 10‑second bursts until a gentle wobble appears.
🍳 Stovetop (Optional)
Heat a non‑stick skillet over low heat, add a splash of butter, and place the cake in the pan, covering with a lid for 3‑4 minutes. This method revives the crust while keeping the interior molten.
🍷 Perfect Pairings
🥗 Side Dishes
- Fresh Mixed Berries: The tartness of strawberries and blackberries cuts through the richness.
- Caramelized Pear Slices: Sweet, buttery pears add a seasonal touch.
- Light Citrus Salad: A salad with orange segments, mint, and a drizzle of honey brightens the palate.
🍷 Wine & Beverage Pairings
- Late Harvest Riesling: Its honeyed acidity balances the chocolate’s bitterness.
- Ruby Port: The deep fruit notes echo the chocolate while adding warmth.
- Non‑Alcoholic: Sparkling pomegranate juice offers a refreshing, slightly tart complement.
🍰 Completing the Meal
Begin with a light salad of arugula, shaved Parmesan, and lemon vinaigrette. Follow with a simple consommé or a mushroom risotto for an elegant main course. Finish the evening with a palate‑cleansing sorbet—lemon or raspberry—before the lava cake arrives.
❓ Frequently Asked Questions
Q: Why does my lava cake sometimes turn out solid in the center?
The most common cause is over‑baking. The oven temperature may vary, so use an oven thermometer and set a timer for 10 minutes. Check the edges; they should be firm while the center still jiggles. If you prefer a more fluid center, reduce the baking time by 1‑2 minutes.
Q: Can I use a different size of ramekin?
Yes, but adjust the baking time accordingly. Larger ramekins (8‑ounce) need about 2‑3 extra minutes; smaller ones (4‑ounce) may bake in 8‑9 minutes. The batter volume should fill each ramekin no more than ¾ full to allow room for rise.
Q: How do I make the lava cake gluten‑free?
Substitute the all‑purpose flour with a 1:1 gluten‑free flour blend that contains xanthan gum. The texture will remain tender, and the lava effect will stay intact. Ensure the blend is well‑sifted to avoid lumps.
Q: My ice cream melts too fast—any solutions?
Keep the ice cream in the freezer until just before serving, and consider using a silicone mold to pre‑shape the scoops. You can also add a pinch of sea salt to the ice cream base; it slightly raises the freezing point, slowing melt.
Q: Can I prepare the batter ahead of time?
Absolutely. After mixing, cover the batter with plastic wrap and refrigerate for up to 24 hours. Let it sit at room temperature for 10 minutes before portioning and baking. The chilled batter helps achieve a sharper crust.
Q: What’s the best way to store leftovers?
Store baked cakes in an airtight container in the refrigerator for up to 3 days. Reheat gently in the oven as described in the reheating section. Ice cream should be stored separately in a freezer‑safe container.
🎉 Let’s Get Baking!
This Chocolate Lava Cake with Ice Cream is more than a dessert; it’s an experience that brings together the comfort of warm chocolate and the refreshing coolness of vanilla ice cream. By following the precise steps, you’ll achieve a perfectly cracked crust that reveals a river of molten chocolate—an instant crowd‑pleaser for any occasion.
Remember, the secret lies in quality ingredients, precise timing, and a little patience. Whether you serve it for a romantic dinner, a holiday gathering, or a casual weekend treat, the result will always be unforgettable. Dive in, experiment with the variations, and make this recipe your own signature dessert.
Have you tried this recipe?
Leave a comment and rating below! Share your photos on Instagram with #LavaCakeDelight to be featured on our page.
Chocolate Lava Cake with Ice Cream
A molten chocolate cake paired with silky vanilla ice cream – a timeless classic with a modern twist.
📝 Ingredients
Chocolate Lava Cake
Vanilla Ice Cream (optional)
Garnish
👨🍳 Instructions
- Grease four 6‑ounce ramekins with melted butter and dust with flour.
- Pre‑heat the oven to 220 °C (425 °F) and place a baking sheet on the middle rack.
- Melt chocolate and butter together over a bain‑marie, then let cool for 5 minutes.
- Whisk eggs and sugar until pale and thick (ribbon stage).
- Fold the cooled chocolate mixture into the egg mixture, then sift flour and salt, folding gently.
- Divide batter evenly among the ramekins.
- Bake for 10‑12 minutes until edges are set but the center still jiggles.
- While baking, prepare vanilla ice cream or have store‑bought ready.
- Let cakes rest 1 minute, then invert onto plates, dust with powdered sugar, and garnish with raspberries.
- Serve immediately with a generous scoop of ice cream.
🥗 Nutritional Information (per serving)
*Values are estimates based on standard ingredient brands.
📚 You Might Also Like
Salted Caramel Tart
Lemon Basil Sorbet
Raspberry Pistachio Pavlova

💬 Comments & Reviews
Leave a Comment
No comments yet. Be the first to share your thoughts!