I once found myself standing in a kitchen that smelled like burnt sugar and regret after a failed attempt at a classic chocolate peanut butter cookie. The batter had turned into a gloopy mess that refused to set, and I was staring at a tray of sad, flat discs that looked more like cardboard than dessert. I swear I heard the clock mock me as the minutes ticked by, and I thought, “There has to be a better way.” That moment sparked a tiny kitchen rebellion, and after countless trial‑and‑error sessions, I finally nailed the version that makes my friends beg for the recipe on the spot. This is hands down the best version you’ll ever make at home, and I’m about to spill every secret.
Picture this: you open a pantry and pull out a jar of creamy peanut butter that glistens like liquid gold, a block of butter that melts like butter (pun intended), and a bag of rolled oats that whisper promises of crunch. The air fills with a buttery perfume that instantly makes you think of movie‑theater popcorn, but then a deep, dark chocolate aroma sneaks in, wrapping the room in a cozy, indulgent hug. You hear the gentle hiss of the butter and honey bubbling together, a sound that says, “We’re about to create something magical.” The texture of the mixture as you stir is a perfect balance of glossy sheen and thick, velvety body—like a silk scarf sliding over a rugged denim jacket.
What makes this recipe truly stand out is the surprise element: a splash of espresso that intensifies the chocolate without tasting like coffee, and a handful of crispy rice cereal that adds a light, airy crunch that shatters like thin ice when you bite in. Most recipes get this completely wrong—either they end up too sticky, too dry, or they lack that unforgettable snap. I’ll be honest — I ate half the batch before anyone else got to try it, and that’s a confession I’m not ashamed to make because the flavor is that good. I dare you to taste this and not go back for seconds. Let me walk you through every single step — by the end, you’ll wonder how you ever made it any other way.
What Makes This Version Stand Out
- Flavor Fusion: The espresso‑enhanced chocolate deepens the cocoa notes, while the peanut butter adds a buttery, salty richness that dances on the palate.
- Texture Triumph: The combination of rolled oats, crispy rice, and chopped peanuts creates layers of crunch that contrast beautifully with the smooth chocolate coating.
- Simplicity Supreme: No oven, no fancy equipment—just a saucepan, a whisk, and a couple of minutes of your time.
- Ingredient Quality: Using high‑fat peanut butter and real dark chocolate makes the cookie dense enough to satisfy cravings but light enough to eat multiple pieces.
- Crowd‑Pleaser: Kids love the peanut‑butter‑chocolate combo, while adults appreciate the subtle espresso kick and the nostalgic crunch.
- Make‑Ahead Magic: These cookies keep their texture for up to a week, and they freeze beautifully for future snack attacks.
- Budget Friendly: All ingredients are pantry staples you probably already own, keeping the cost low without sacrificing taste.
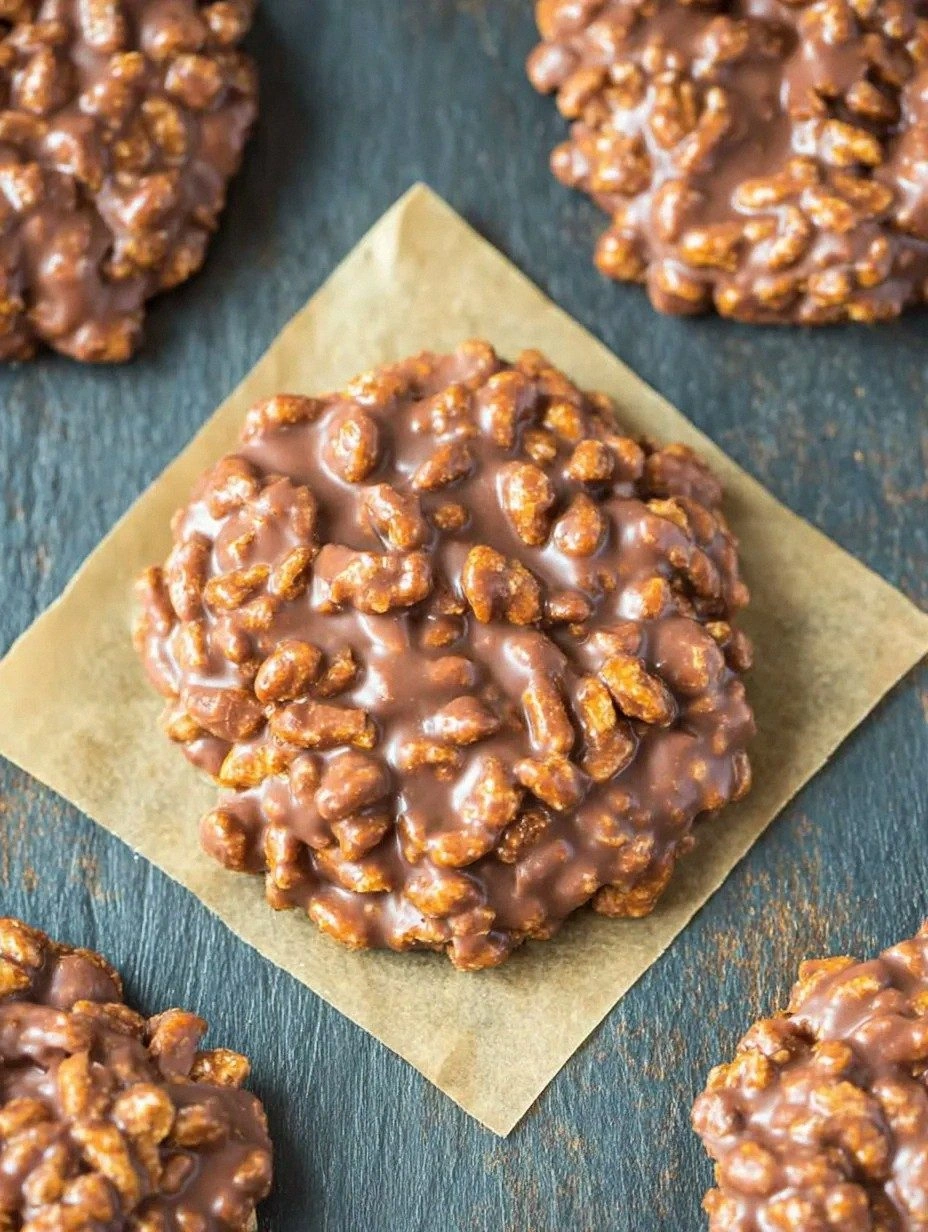
- Visual Appeal: The glossy chocolate glaze and speckled peanut bits make each cookie look like a tiny, edible work of art.
Inside the Ingredient List
The Flavor Base
The heart of these cookies is a blend of creamy peanut butter, melted butter, and honey. Peanut butter provides a salty‑sweet backbone that holds the mixture together, while butter adds richness and a silky mouthfeel. Honey isn’t just a sweetener; it acts as a natural binder, ensuring the cookies set firmly without becoming hard. If you skip the honey, you’ll end up with a crumbly mess that refuses to hold its shape. A good swap for honey is maple syrup, but keep in mind it will add a subtle caramel note.
The Texture Crew
Rolled oats deliver a wholesome chew, and crispy rice cereal injects that airy snap you crave. The oats absorb some of the butter‑honey mixture, giving each bite a satisfying body, while the rice cereal stays light, preventing the cookie from feeling dense. If you’re gluten‑free, swap the oats for gluten‑free rolled oats or puffed quinoa; the texture remains just as delightful. Chopped peanuts add an extra layer of crunch and a visual speckle that makes the cookies look even more appetizing.
The Unexpected Star
A dash of espresso powder is the secret weapon. It doesn’t make the cookies taste like coffee; instead, it amplifies the chocolate’s depth, creating a richer, more complex flavor profile. This tiny ingredient is the difference between “good” and “mind‑blowing.” If you’re not a coffee fan, you can replace it with a pinch of smoked paprika for a subtle smoky undertone, but be prepared for a very different experience.
The Final Flourish
Semi‑sweet chocolate chips are melted and poured over the set cookies, forming a glossy, crackly shell that hardens quickly. The chocolate not only adds decadence but also creates a protective barrier that locks in moisture, keeping the interior chewy. Use high‑quality chocolate with at least 60% cocoa for the best flavor; low‑quality chips can taste waxy. A splash of vanilla extract rounds out the flavor, adding a fragrant note that ties the whole cookie together.
Everything's prepped? Good. Let's get into the real action...
The Method — Step by Step
Grab a medium saucepan and set it over medium heat. Toss in the butter and honey, letting them melt together while you stir with a silicone spatula. You’ll hear a gentle sizzle—this is the moment where the magic begins. Keep the mixture moving so it doesn’t brown; you want a smooth, golden pool that smells like a bakery on a Sunday morning. Once fully combined, remove the pan from the heat and set aside for a brief cool‑down.
Now, stir in the creamy peanut butter while the butter‑honey blend is still warm. The peanut butter should melt into a glossy, thick ribbon that coats the back of your spoon. If it looks lumpy, keep whisking—patience here prevents pockets of oil later on. Add the vanilla extract and the espresso powder, watching the mixture darken just a shade, a visual cue that the flavor is deepening. This step? Pure magic.
In a large mixing bowl, combine the rolled oats, crispy rice cereal, and chopped peanuts. Give the dry ingredients a quick toss so they’re evenly distributed. This is where the texture crew meets the flavor base. Sprinkle the dry mix into the warm peanut‑butter mixture, folding gently until every oat is coated. The batter should look thick but still pliable, like a soft dough that holds together when pressed.
Line a baking sheet with parchment paper—no greasing needed because the chocolate will keep the cookies from sticking. Using a cookie scoop or a tablespoon, portion out the batter onto the sheet, spacing them about an inch apart. Press each mound lightly with the back of a spoon to flatten them to about half an inch thick. The shape doesn’t have to be perfect; a rustic look adds charm.
While the cookies set, melt the chocolate chips in a heat‑proof bowl over a pot of simmering water (bain‑marie) or in 30‑second bursts in the microwave, stirring in between. The chocolate should become a glossy, fluid river—if it looks grainy, add a teaspoon of coconut oil (see Kitchen Hack above). Once melted, let it sit for a minute; you’ll notice the surface forming tiny bubbles, a sign it’s ready for a smooth pour.
Now comes the fun part: drizzle or dip each cookie in the melted chocolate. If you’re drizzling, use a spoon to create a zig‑zag pattern; if you’re dipping, submerge the cookie halfway, letting excess drip off. The chocolate will harden within minutes at room temperature, forming a crackly shell that snaps satisfyingly when you bite. This step is where the cookies transform from simple bars to elegant treats.
Allow the chocolate‑coated cookies to set completely—about 15 minutes on the counter or 5 minutes in the fridge if you’re impatient. Once the chocolate is firm, transfer the cookies to an airtight container. They’ll stay fresh for up to a week, and the flavor actually improves as the ingredients meld together.
And now the fun part: serve! Arrange the cookies on a platter, maybe with a few extra chocolate shards for garnish. Picture yourself pulling this out of the fridge, the whole kitchen smelling incredible, and your friends’ eyes widening as they take that first bite. That sizzle when the butter hit the pan? Absolute perfection. Okay, ready for the game‑changer? The next batch you make, try sprinkling a pinch of flaky sea salt on top of the chocolate for a sweet‑salty pop that’ll have everyone asking for the recipe again.
That's it — you did it. But hold on, I've got a few more tricks that'll take this to another level...
Insider Tricks for Flawless Results
The Temperature Rule Nobody Follows
Never let the butter‑honey mixture boil; keep it just below a gentle simmer. If it overheats, the sugar can caramelize too quickly, giving the cookies a bitter edge. I once let it boil for a minute and the entire batch tasted like burnt toast—trust me, it’s not worth the drama. Keep a candy thermometer handy; aim for 115°F (46°C) before adding the peanut butter.
Why Your Nose Knows Best
Your sense of smell is a reliable indicator of doneness. When the butter‑honey mixture starts to emit a nutty, toasty aroma, you’re at the perfect point to combine it with the peanut butter. If the scent is still raw or overly sweet, give it another 30 seconds. This sensory checkpoint saves you from a batch that’s either too soft or too hard.
The 5‑Minute Rest That Changes Everything
After you mix the wet and dry components, let the batter rest for five minutes. This short pause allows the oats to absorb moisture, resulting in a chewier interior. Skipping this step leads to a crumbly texture that falls apart when you try to lift the cookie. I once rushed this step and ended up with a mess—lesson learned.
Sea Salt Finish
A light sprinkle of flaky sea salt on the chocolate coating just before it sets creates a contrast that elevates the flavor. The salt amplifies the chocolate’s bitterness and balances the sweetness of the honey and peanut butter. Don’t overdo it—just a pinch per cookie is enough to make a noticeable difference.
Chocolate Tempering Shortcut
If you want a glossy, snap‑perfect chocolate shell without a tempering machine, melt the chocolate to 115°F, then cool it down to 80°F before reheating to 88°F. This quick tempering method prevents bloom and gives the cookies a professional finish. It’s a trick I learned from a pastry chef friend, and it’s worth the extra minute.
Creative Twists and Variations
This recipe is a playground. Here are some of my favorite ways to switch things up:
Nutty Banana Boost
Mash a ripe banana into the peanut butter before mixing. The banana adds natural sweetness and a moist crumb, turning the cookie into a breakfast‑friendly treat. Pair it with dark chocolate for a sophisticated flavor.
White Chocolate Coconut Dream
Swap the semi‑sweet chocolate for white chocolate and toss in toasted coconut flakes. The result is a tropical twist that’s perfect for summer picnics. The coconut’s aroma pairs beautifully with the peanut butter’s earthiness.
Spicy Chili Kick
Add a pinch of cayenne pepper or a few dashes of chili oil to the chocolate melt. The subtle heat awakens the palate and makes the cookie an unexpected party starter. Just remember: a little goes a long way.
Nut‑Free Delight
Replace peanut butter with sunflower seed butter or almond butter for those with nut allergies. The flavor changes slightly but remains rich, and the texture stays just as crunchy thanks to the oats and rice cereal.
Double‑Chocolate Overload
Fold in 1/4 cup cocoa powder into the batter and use dark chocolate chips for the coating. This creates a deep, fudgy interior that satisfies any chocolate lover’s cravings. Serve with a glass of cold milk for the ultimate comfort.
Storing and Bringing It Back to Life
Fridge Storage
Place the cookies in an airtight container lined with parchment paper. They’ll stay fresh for up to 7 days. The cool environment keeps the chocolate firm and prevents the interior from getting soggy.
Freezer Friendly
For longer storage, arrange the cookies on a tray, freeze for 2 hours, then transfer to a zip‑top bag. They’ll keep for up to 3 months. When you’re ready to enjoy, let them thaw at room temperature for 15 minutes; the chocolate will regain its snap.
Best Reheating Method
If the cookies feel a bit firm after refrigeration, pop them in the microwave for 10‑15 seconds. Add a tiny splash of water to the plate before microwaving; the steam revives the interior without melting the chocolate. This trick brings them back to that just‑baked perfection.