I’m going to start with a confession that might make you roll your eyes: I once burned a batch of lemon bars so badly that the kitchen smelled like a citrus‑filled fireworks disaster. I swear, the smoke alarm was screaming louder than a crowd at a concert, and I was left with a pan of charred disappointment. But that fiasco sparked a relentless quest for the perfect lemon‑poppy‑seed bar, one that would never let me down. I tried every recipe on the internet, from the ones that promised a “light, fluffy crumb” to those that bragged about a “glossy, tangy glaze.” Most of them missed the mark, either by being too dry, too soggy, or simply lacking that zing that makes you gasp with each bite.
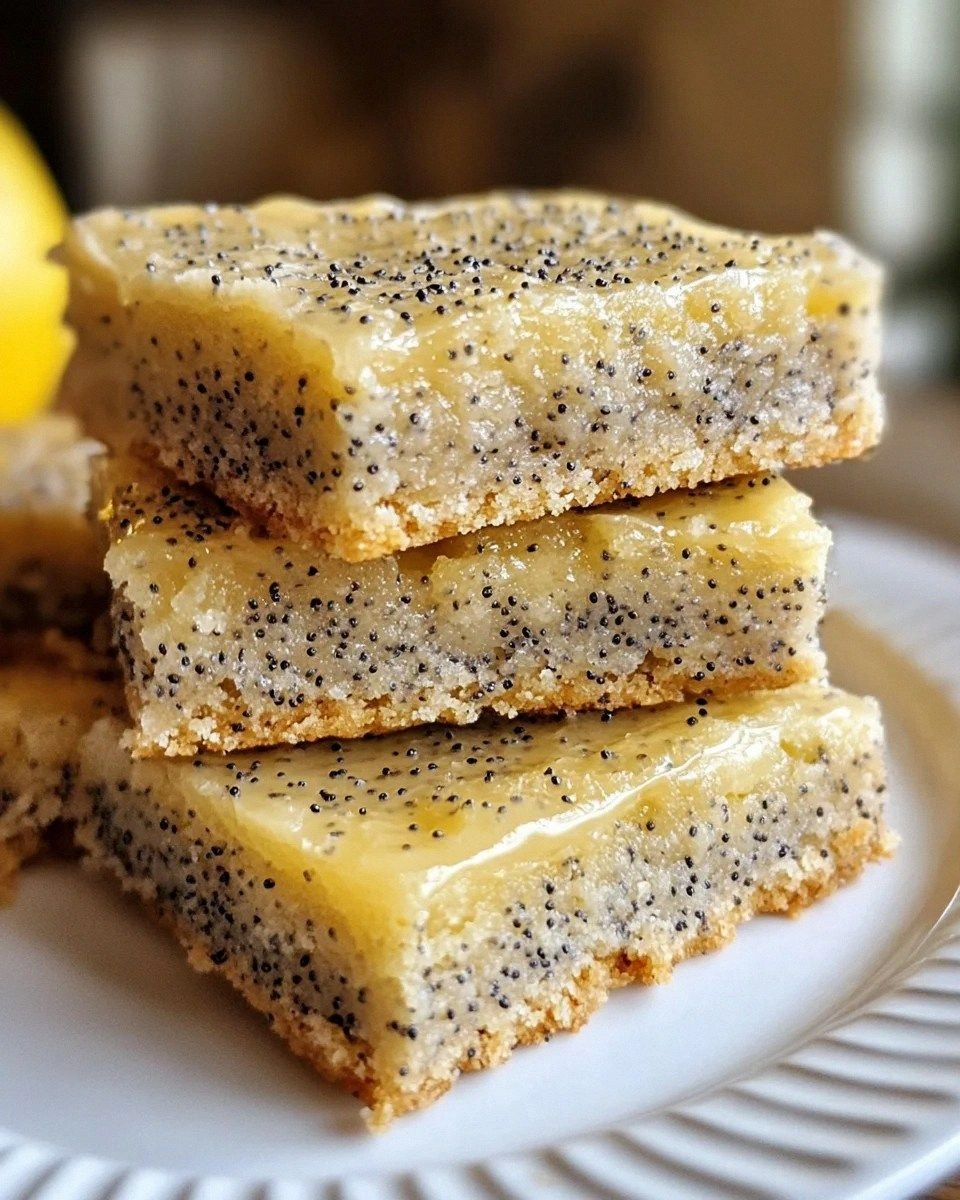
Picture this: the moment you pull the tray out of the oven, the kitchen is filled with the bright perfume of lemon zest mingling with the subtle nuttiness of poppy seeds. The bars have a golden‑brown top that glistens like a freshly polished marble slab, and the edges are crisp enough to snap with a satisfying crack, while the center stays soft and buttery, almost melt‑in‑your‑mouth. When you drizzle the glaze over the warm bars, it spreads like liquid sunshine, sealing in the flavor and giving each square a glossy finish that looks too good to eat—yet you can’t help yourself. I dare you to taste this and not go back for seconds; the balance of sweet, tart, and buttery is practically a love affair in your mouth.
What truly sets this version apart is a secret technique I discovered while watching a pastry chef on a late‑night cooking show: a brief “steam‑bake” at the start, followed by a high‑heat finish. This two‑stage bake creates a custardy interior while keeping the top perfectly caramelized. Most recipes get this completely wrong, either baking at a steady temperature or neglecting the glaze until the bars are completely cooled, which results in a dull, soggy top. Here, we give the glaze a quick flash bake, so it sets into a thin, glossy armor that locks in moisture and flavor. The poppy seeds are toasted just enough to release a subtle, nutty aroma without turning bitter—a detail most bakers overlook.
And there’s a surprise ingredient that will make you question every lemon bar you’ve ever had: a splash of high‑quality vanilla bean paste. It adds a depth that makes the lemon sing instead of shouting, rounding out the tartness with a warm, fragrant undertone. Okay, ready for the game‑changer? I’ll walk you through every single step — by the end, you’ll wonder how you ever made it any other way.
What Makes This Version Stand Out
- Flavor Explosion: The combination of fresh lemon zest, juice, and vanilla creates a layered citrus profile that’s bright yet comforting.
- Texture Symphony: A crisp, caramelized edge meets a soft, almost custard‑like center, while the glaze adds a satin‑smooth finish.
- Simplicity Meets Sophistication: Only pantry staples and a few fresh ingredients are needed, yet the result feels like a patisserie masterpiece.
- Unique Two‑Stage Bake: The steam‑bake followed by a high‑heat finish guarantees the perfect crumb and a glossy top.
- Crowd‑Pleaser Factor: Guests often claim they’ve never tasted anything like it, and the bars disappear faster than you can say “lemon poppy.”
- Ingredient Quality: Using organic lemons and real vanilla bean paste elevates the dish from good to unforgettable.
- Make‑Ahead Magic: These bars keep their texture and flavor for up to four days in the fridge, making them ideal for brunch prep.
- Versatile Serving: Perfect as a dessert, a sweet snack, or a sophisticated addition to a tea party spread.
Inside the Ingredient List
The Flavor Base
Fresh lemon zest is the heart of this recipe. Zest contains the essential oils that give lemons their bright, aromatic punch, far more potent than juice alone. If you skip the zest, you’ll lose that fragrant snap that makes the bars sing. A good tip is to zest the lemon before juicing it; the rind is easier to handle when it’s still firm. If you can’t find fresh lemons, a high‑quality lemon zest powder can work, but the flavor won’t be as lively.
The Texture Crew
All‑purpose flour provides the structure, while unsalted butter creates a tender crumb. The butter should be softened, not melted, to trap air during creaming, which leads to a light, airy texture. If you use melted butter, the bars will be dense and greasy. For a gluten‑free twist, swap the flour for a 1:1 gluten‑free blend, but add a teaspoon of xanthan gum to retain structure.
The Unexpected Star
Poppy seeds are the secret hero. Toasted lightly, they release a subtle, nutty flavor that balances the tart lemon. If you skip the toast, the seeds can taste raw and bitter. When buying poppy seeds, choose a fresh, airtight package; older seeds lose their crunch. If you’re allergic to poppy seeds, try finely chopped almonds for a similar crunch and a hint of buttery flavor.
The Final Flourish
The glaze combines powdered sugar, fresh lemon juice, and a whisper of vanilla bean paste. The powdered sugar dissolves instantly, creating a glossy, firm coating that sets as it cools. The vanilla bean paste is not optional; it deepens the citrus notes, preventing the glaze from tasting one‑dimensional. If you prefer a less sweet glaze, reduce the powdered sugar by a quarter and add a splash of milk to keep the consistency smooth.
Everything's prepped? Good. Let's get into the real action...
The Method — Step by Step
Preheat your oven to 350°F (175°C). While the oven warms, line a 9×13‑inch baking pan with parchment paper, allowing the edges to overhang for an easy lift‑out later. This step might sound simple, but a well‑lined pan ensures the bars release cleanly without tearing the delicate top.
Kitchen Hack: Chill the parchment paper for 10 minutes before placing the batter; a cold surface helps the edges set faster, giving you that coveted snap.In a large bowl, whisk together 2 cups of all‑purpose flour, 1 tsp baking powder, ½ tsp salt, and 2 tbsp poppy seeds. The whisk should create a light, fluffy cloud of dry ingredients—this is your “flavor dust.” If you hear a faint “whoosh” as the flour moves, you’ve aerated it enough.
In a separate bowl, cream ¾ cup (1½ sticks) softened unsalted butter with 1 cup granulated sugar until the mixture is pale and fluffy, about 3‑4 minutes on medium speed. This is where the magic begins; the sugar crystals cut into the butter, creating tiny air pockets that will later expand into a tender crumb.
Add 2 large eggs, one at a time, beating well after each addition. Then stir in 2 tbsp fresh lemon zest, ¼ cup lemon juice, and 1 tsp vanilla bean paste. The batter should look glossy and slightly thick—if it looks too runny, add a tablespoon more flour; if too thick, a splash of milk will rescue it.
Gradually fold the dry “flavor dust” into the wet mixture, using a rubber spatula and a gentle hand. The goal is to incorporate everything without over‑mixing; stop as soon as you no longer see streaks of flour. Over‑mixing develops gluten, which would make the bars tough instead of tender.
Spread the batter evenly in the prepared pan, smoothing the top with an offset spatula. For a professional finish, tap the pan lightly on the counter three times; this releases any large air bubbles and levels the surface.
Watch Out: If you bake the batter uncovered for the full 30 minutes, the top may dry out. Cover loosely with foil after 20 minutes to retain moisture.Place the pan in the oven and bake for 20 minutes. Then, reduce the temperature to 325°F (165°C) and continue baking for another 10‑12 minutes, or until a toothpick inserted near the center comes out with just a few moist crumbs. The edges should start pulling away from the sides of the pan—this is your visual cue that the crust is forming.
While the bars are still warm, whisk together 1 cup powdered sugar, 2 tbsp fresh lemon juice, and ½ tsp vanilla bean paste to create the glaze. Drizzle the glaze over the hot bars, using a spatula to spread it thinly and evenly. The heat will melt the glaze, allowing it to seep into every crevice, creating that glossy armor I promised.
Kitchen Hack: For an ultra‑smooth glaze, sift the powdered sugar before mixing; this eliminates any lumps that could ruin the shine.Allow the bars to cool completely in the pan on a wire rack. This cooling period lets the glaze set firmly and the crumb firm up, making it easier to cut clean squares. Once cooled, use the parchment overhang to lift the entire slab onto a cutting board, then slice into 12‑16 bars depending on your preferred size.
That's it — you did it. But hold on, I've got a few more tricks that'll take this to another level...
Insider Tricks for Flawless Results
The Temperature Rule Nobody Follows
Never bake lemon bars at a scorching 400°F. High heat creates a dry, uneven crumb and can cause the glaze to caramelize too quickly, turning bitter. Instead, start at 350°F for a gentle rise, then lower to 325°F to finish. This two‑stage approach ensures the interior stays moist while the top develops that coveted caramelized edge. I once tried a single‑high‑heat blast; the result was a crunchy, almost burnt crust that made my taste buds cringe.
Why Your Nose Knows Best
Your sense of smell is the ultimate timer. About five minutes before the timer dings, you’ll notice a sweet‑citrus aroma wafting from the oven, followed by a faint buttery note. If the scent turns nutty or burnt, pull the pan out early. Trusting your nose prevents over‑baking, which is the most common reason lemon bars end up dry.
The 5‑Minute Rest That Changes Everything
After the glaze sets, let the bars rest for exactly five minutes before cutting. This short pause allows the glaze to firm up just enough to hold its shape, while the crumb finishes its final steam‑settle. Cutting too early creates a sloppy, runny glaze that smears across the plate; wait five minutes and you’ll get clean, glossy edges that look restaurant‑ready.
Butter Temperature Is Everything
Softened butter should be at room temperature—warm enough to leave an indentation when pressed, but not melted. If the butter is too soft, the batter will spread too thin, resulting in a flat, dense bar. If it’s too cold, you’ll end up with pockets of unmixed butter that create greasy spots. A quick tip: cut the butter into cubes and let it sit for 15 minutes; this speeds up the softening without melting.
Creative Twists and Variations
This recipe is a playground. Here are some of my favorite ways to switch things up:
Berry Burst
Fold in ½ cup of fresh raspberries or blueberries into the batter before baking. The berries add a burst of juiciness that complements the lemon, and the speckled pink or blue spots make the bars look festive—perfect for a summer brunch.
Almond Crunch
Replace half of the poppy seeds with toasted slivered almonds. The almonds introduce a buttery crunch that pairs beautifully with the citrus glaze, and the nutty aroma adds an extra layer of sophistication.
Herbal Infusion
Add 1 teaspoon of finely chopped fresh rosemary or thyme to the dry mix. The herb’s piney notes create an unexpected savory‑sweet balance, turning the bars into an elegant after‑dinner bite.
Chocolate Drizzle
Melt ¼ cup dark chocolate and drizzle it over the set glaze. The bitterness of dark chocolate contrasts the bright lemon, delivering a complex flavor profile that will wow even the most discerning chocolate lovers.
Gluten‑Free Glory
Swap the all‑purpose flour for a 1:1 gluten‑free blend and add ½ teaspoon xanthan gum. The texture remains tender, and the bars stay just as flaky—proof that you don’t need wheat to achieve perfection.
Storing and Bringing It Back to Life
Fridge Storage
Place the cooled bars in an airtight container lined with parchment paper. They’ll stay fresh for up to four days. The glaze may firm up a bit, but a quick room‑temperature sit for 10 minutes restores its sheen.
Freezer Friendly
Wrap each bar individually in plastic wrap, then place them in a freezer‑safe zip‑top bag. They’ll freeze beautifully for up to two months. When you’re ready to enjoy, thaw in the refrigerator overnight, then let them sit at room temperature for 15 minutes before serving.
Best Reheating Method
To revive that fresh‑out‑of‑the‑oven glow, preheat your oven to 300°F (150°C), place the bars on a parchment‑lined sheet, and bake for 5‑7 minutes. Add a tiny splash of water (about a teaspoon) to the pan before reheating; the steam will re‑moisturize the crumb while the glaze regains its glossy finish.